
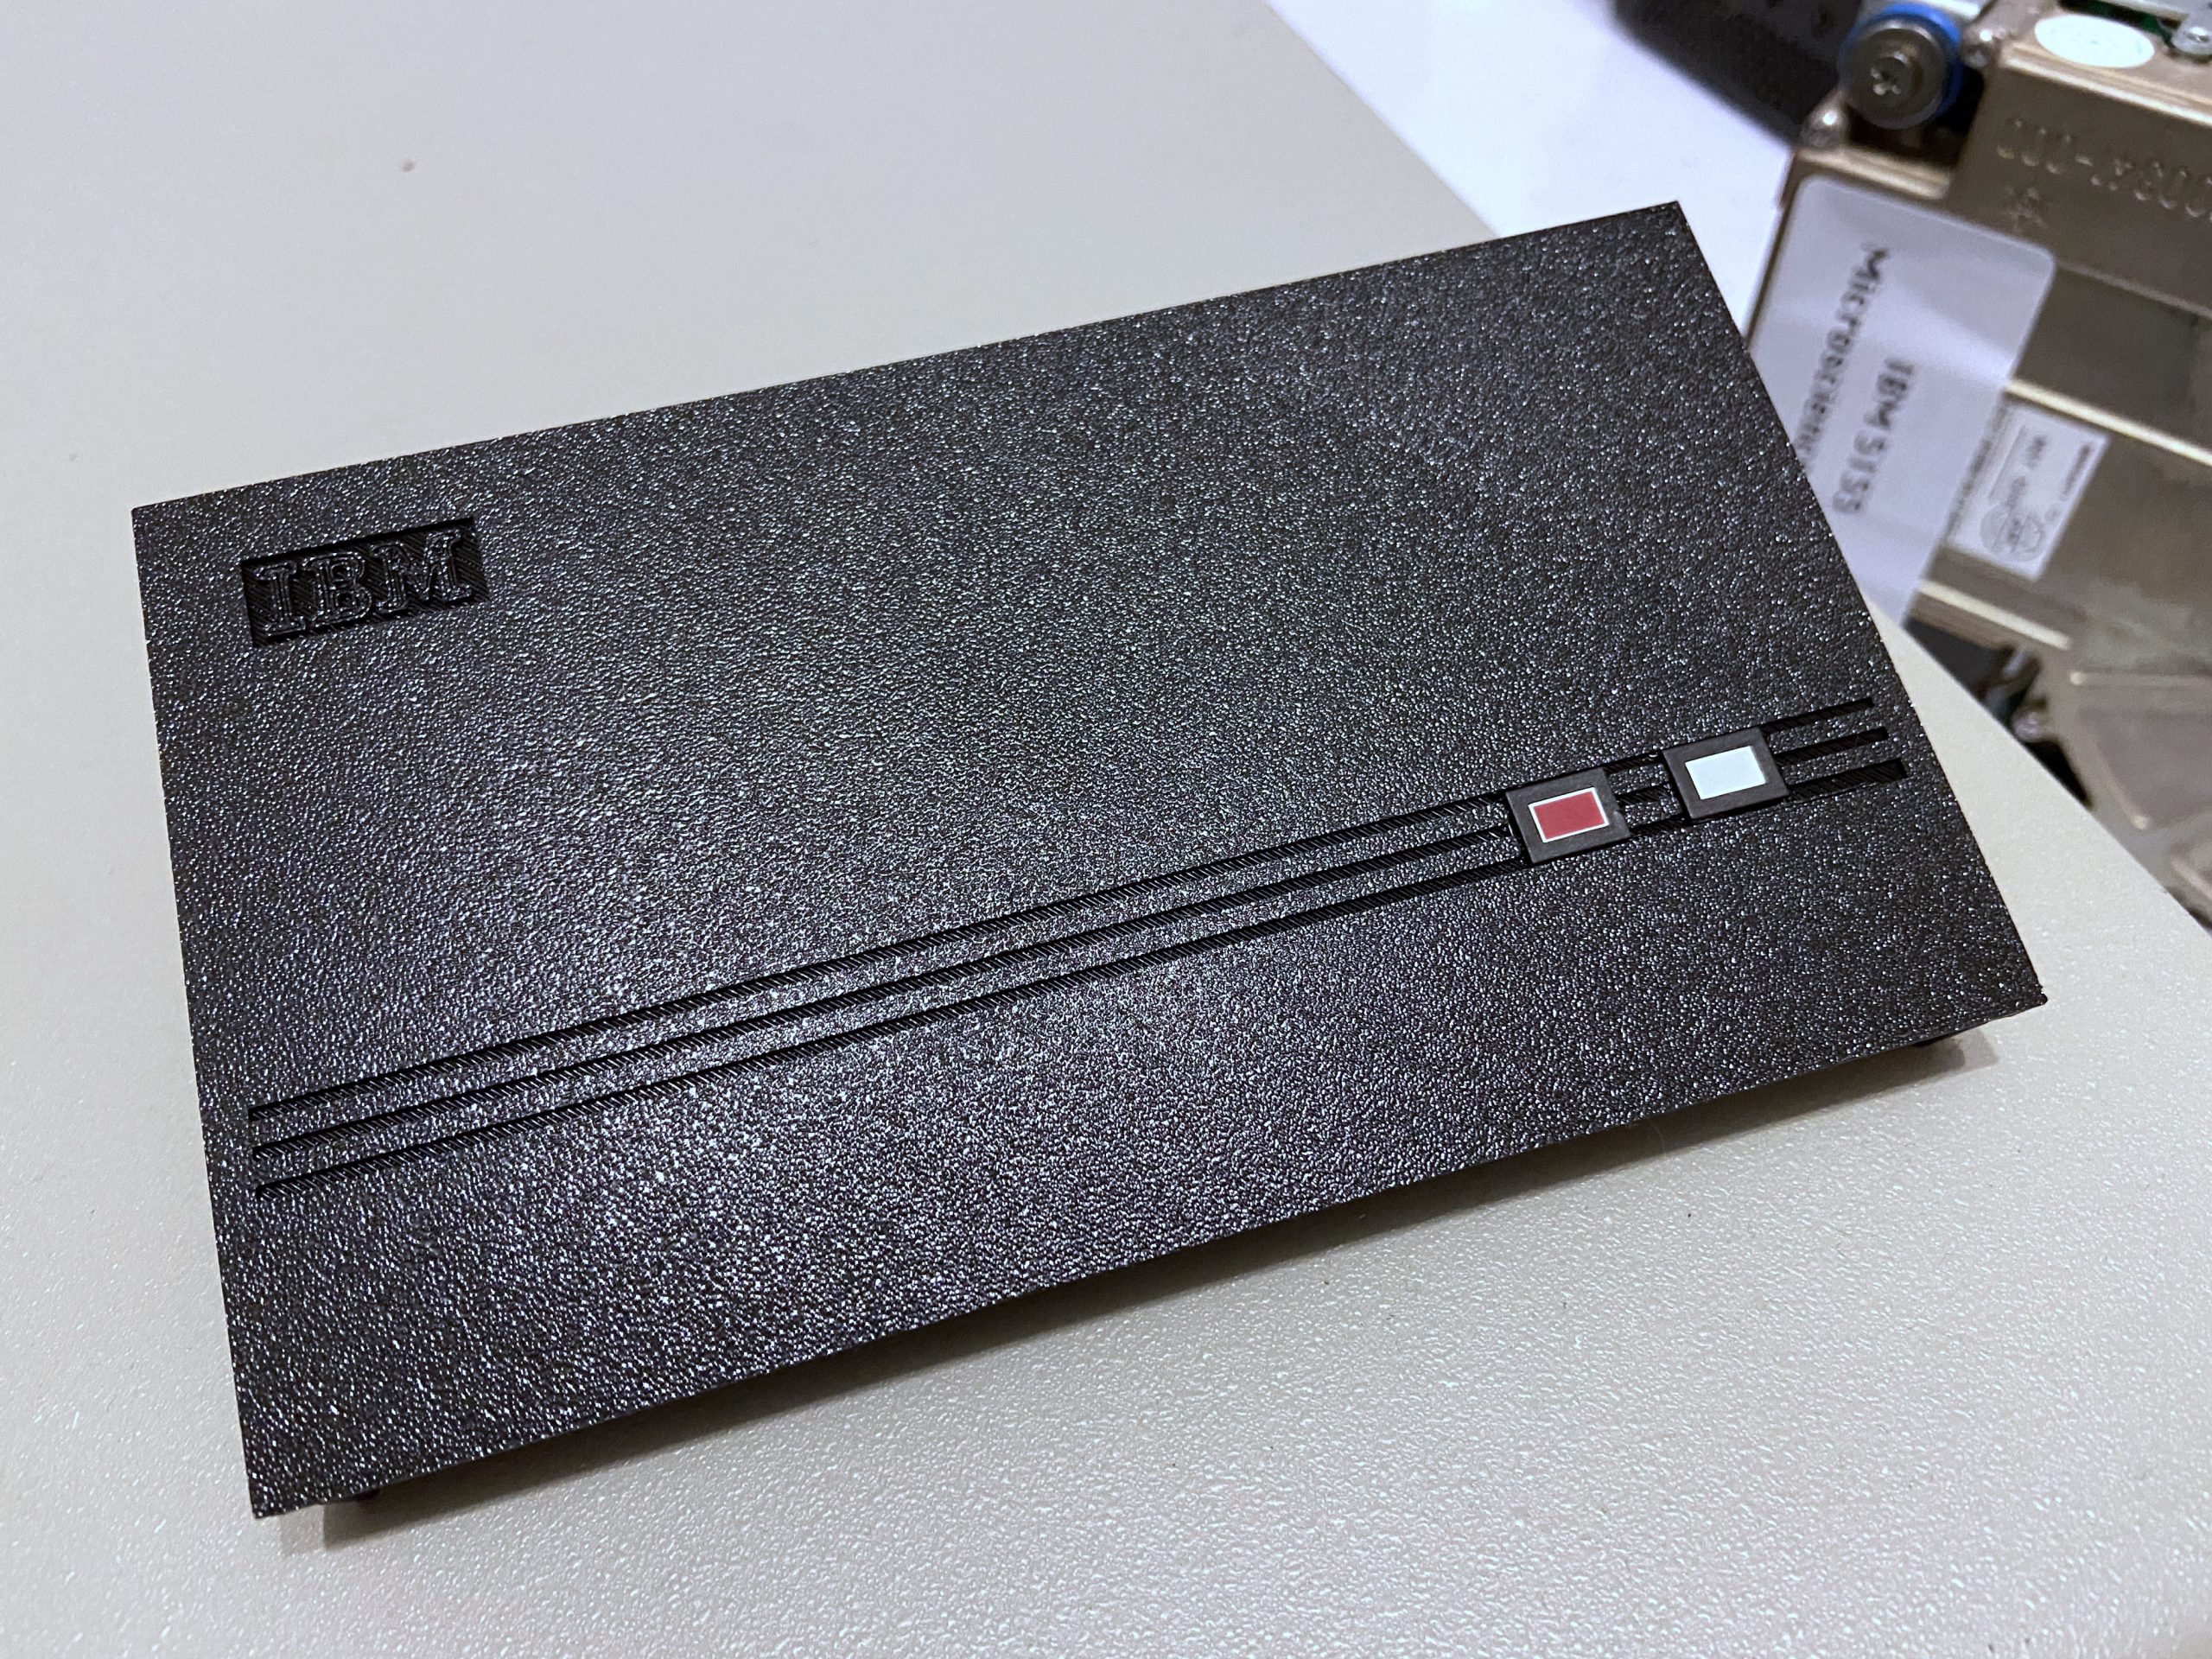
The grandfather of all x86-based PCs—well, this is not quite accurate. The original IBM Personal Computer was the 5150, released in 1981. Here, we’re dealing with the later but very similar 5160 PC XT, released in 1983.
The 5150 started the whole IBM compatible PC era, which continues to the present day. It was a relatively simple design: an Intel 8088 CPU at 4.77MHz, some RAM (16kB initially), some off-the-shelf IO, DMA controllers and timers, plus a ROM-based BIOS containing code for system initialization, IO functions, and BASIC.
The 5160 was different only in a few details: eight instead of five expansion ports – this is what we know as the ISA bus, a 10MB hard drive as standard, memory increased up to 640kB, and the Cassette interface was removed.
Restoration
This PC XT came to me in a sad condition: not working, dirty, some case bolts missing, and no keyboard.
Disassembly
There were only two of five case screws left, one of which didn’t seem to be the right size. Turned out to be a ISA card screw on closer inspection. Inside was the IBM branded Tandon TM100 floppy drive with its controller card, a monochome display adapter, a serial card, the mainboard and the original PSU.

I knew it was defective and indeed, turning on the PSU made the fan spin and the voltage rails come up but the PC did not POST. I actually had hoped for a shorted power rail like on the 5155 which would have been an easy fix.
A closer inspection of the power supply revealed halfway burnt RIFA caps. They weren’t the cause of the PC not POSTing, but I removed them to prevent a stinky blowing up in the future

Cleaning
With everything disassembled, all parts got a thorough clean. Especially the case had to go through a shower as it was full of dust and some insects had made their homes in it.
Troubleshooting
Once the parts were clean and dry, a minimal system with the mainboard and a known good CGA card and the PSU was assembled. It of course did still not POST, so I turned to MinusZeroDegrees and followed the excellent troubleshooting procedure there.
I ended up at the “faulty motherboard” symptom page and working through all steps came to the conclusion that the memory in bank 0 was failing. In that case, the 5160 will play dead, it will not beep nor do anything else.
There is, however, a clever low-level diagnostic built in the BIOS ROM called “Checkpoint Code 4”. While it does nothing observable on screen or via beeper, it will send a bit pattern to IO port 60h, corresponding to the 8255 chip on the motherboard. Specifically, the checkpoint code will write a pattern in a loop to IO port A of that chip, indicating the failing memory bit. With the pinout of that chip at hand, it is possible to identify the problematic memory chip by taking measurements of the output voltages. Surprisingly, a multimeter in DC mode will suffice to do this diagnostic. (I had bought a scope earlier but didn’t need it)
In this case, it was bit #3 of memory bank 0 not working properly. Swapping bank 0 and 1 let the system POST, and it then reported memory issues in bank 1 on screen.
Upgrading memory from 256 to 640kB and adding a NEC V20
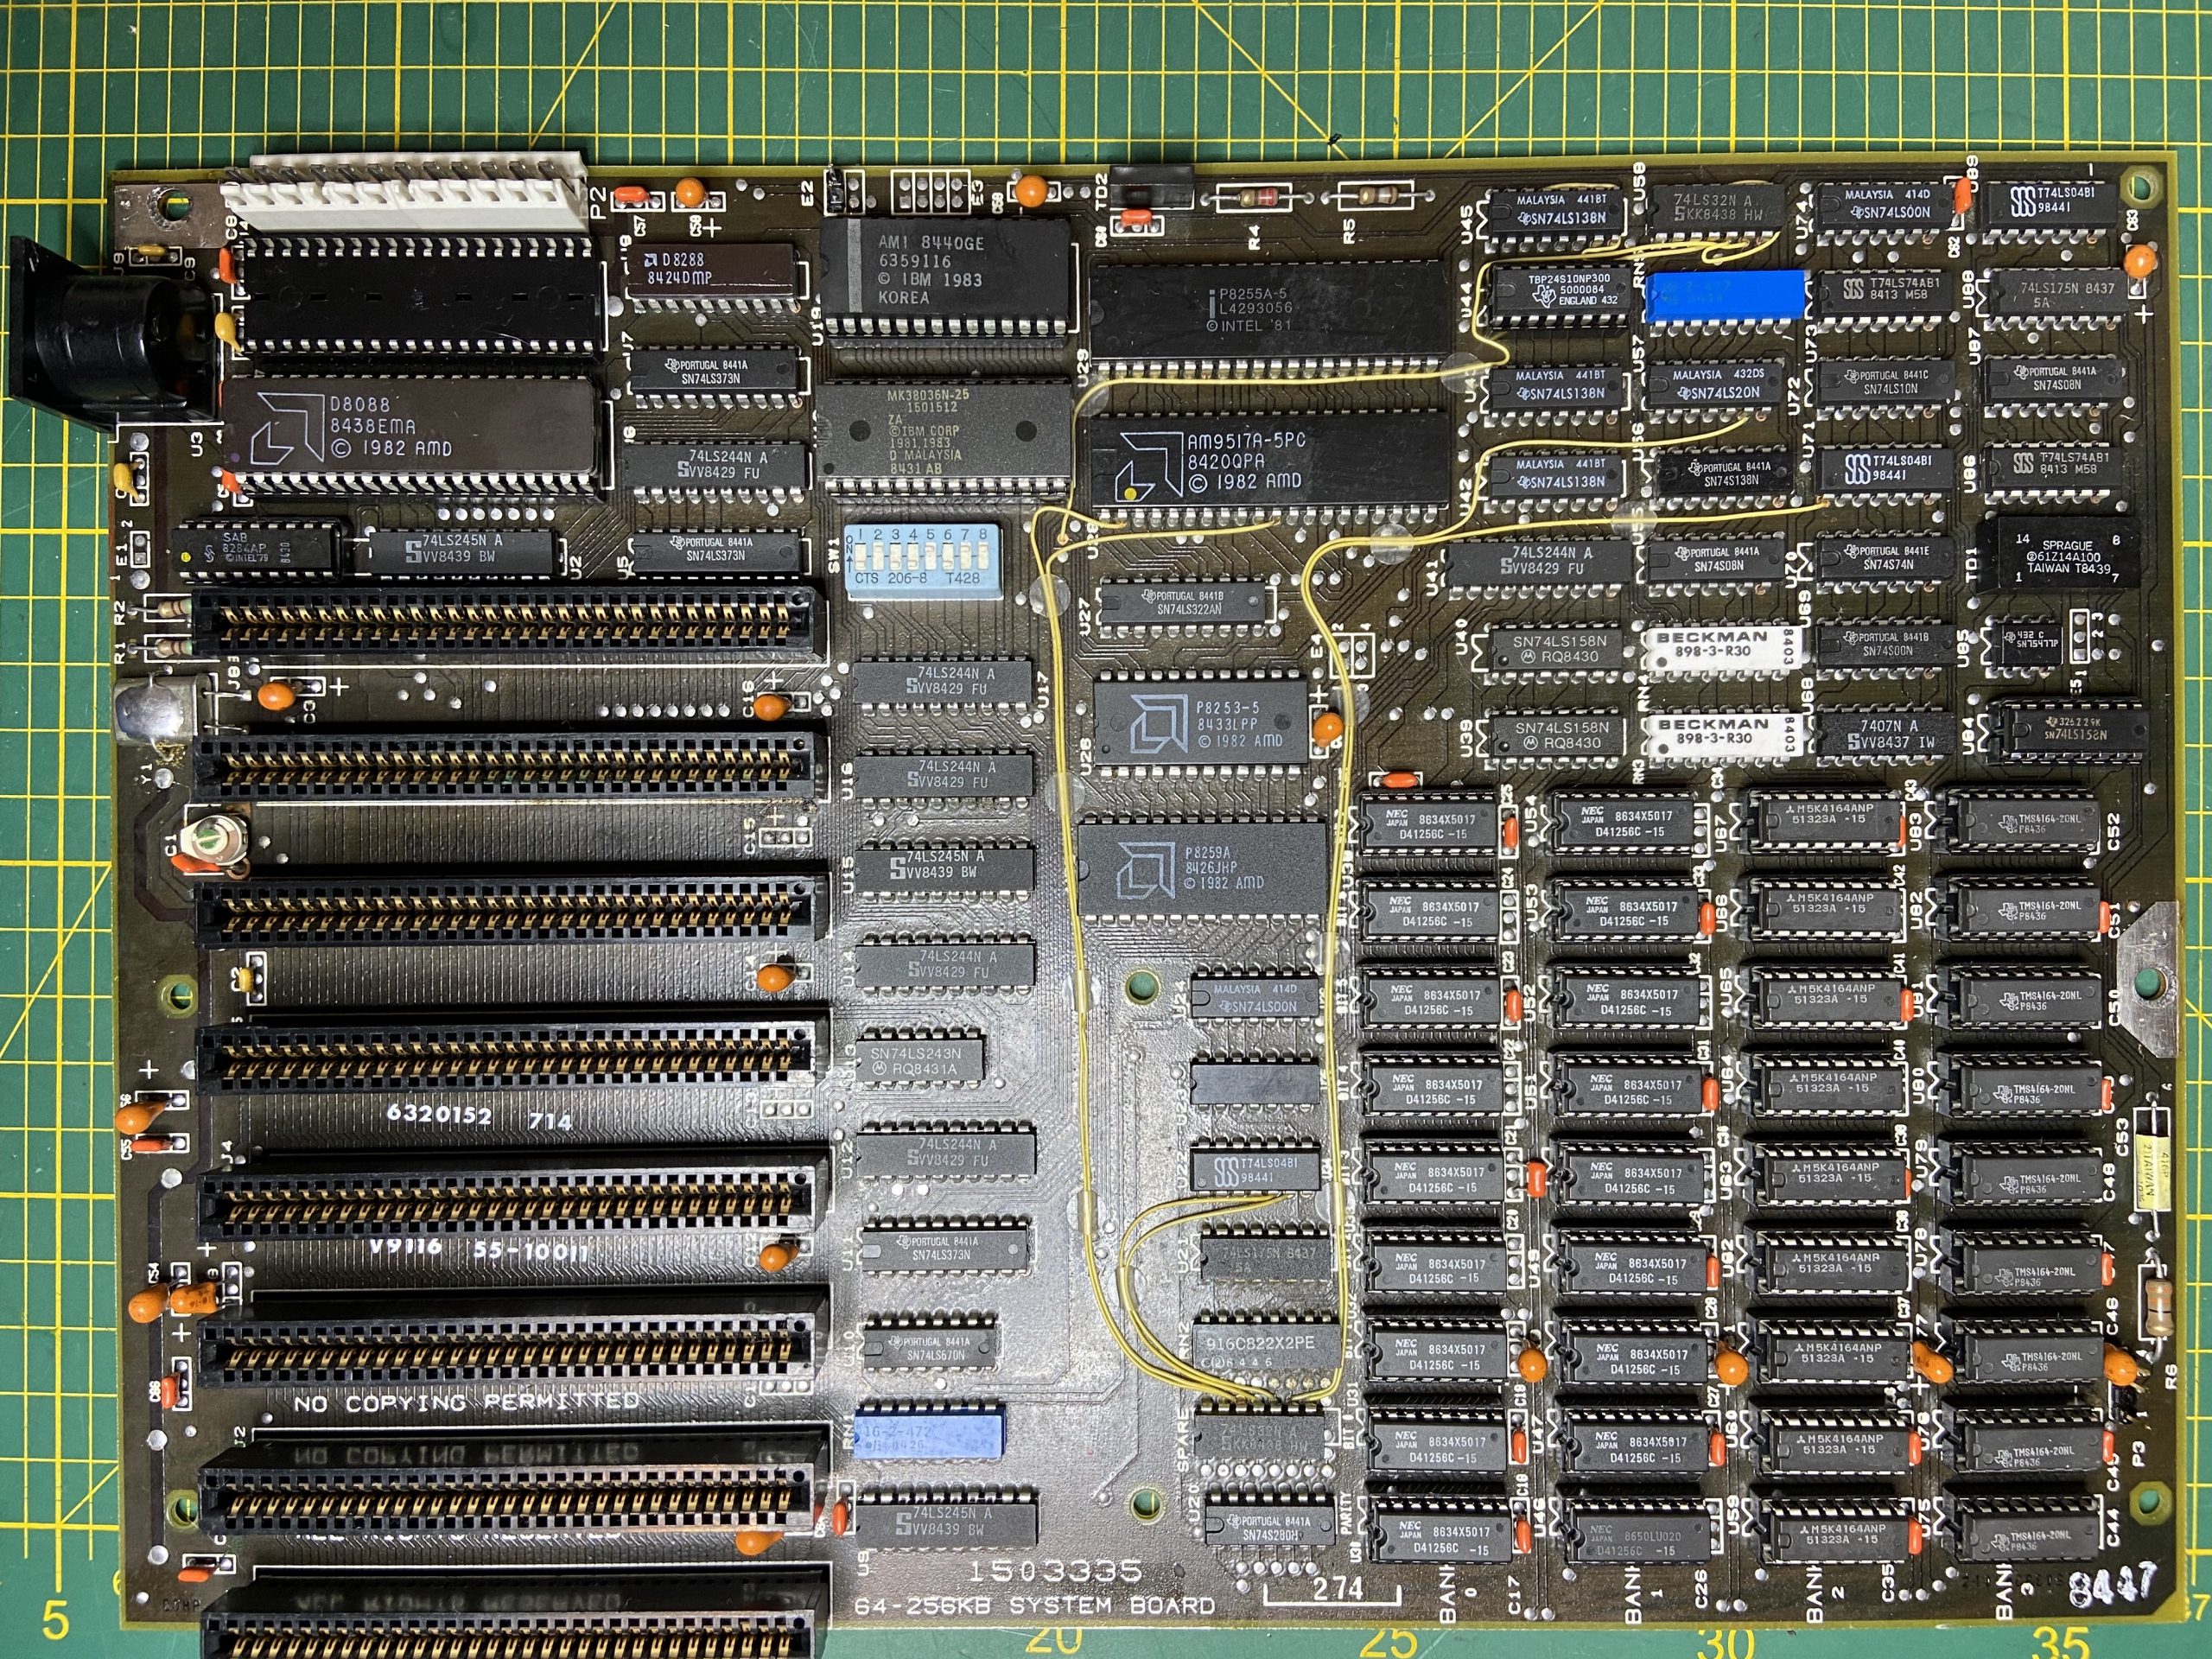
Since I needed to replace the faulty memory chips, I decided to perform the 640kB upgrade right away. Also documented on MinusZeroDegrees, this is actually straightforward because IBM kindly made some provisions to upgrade a 64-256k motherboard to the later 256-640k variant: add a 74LS158 logic chip to the empty socket U84, solder in a jumper to location E2, populate banks 0 and 1 with 41256 memory ICs, and move the original 4164 chips from there to banks 2 and 3.

I replaced the original AMD-made 8088 CPU with an NEC V20 chip since I want to add the PC-Sprint 8 MHz turbo circuit later once my PCBs arrive from China. The V20 slightly improves speed even at the stock 4.77 MHz clock due to a more efficient implementation. It supports the extended instruction set of the 80186, making it easier to work with software that makes use of those instructions, for instance, sound card initialisation programs (see below).

Diskette Drive alignment
Time to clean and lubricate the IBM Tandon TM-100 disk drive. It’s a big chunky beast, so working on it is not too bad. The drive heads and rails are easily reachable, the PCB connects with clearly labeled connectors.
It makes sense to clean and lubricate the guides for the diskette left and right as well as the drive door mechanism which slides up and down. I used some PTFE based dry lube for this.
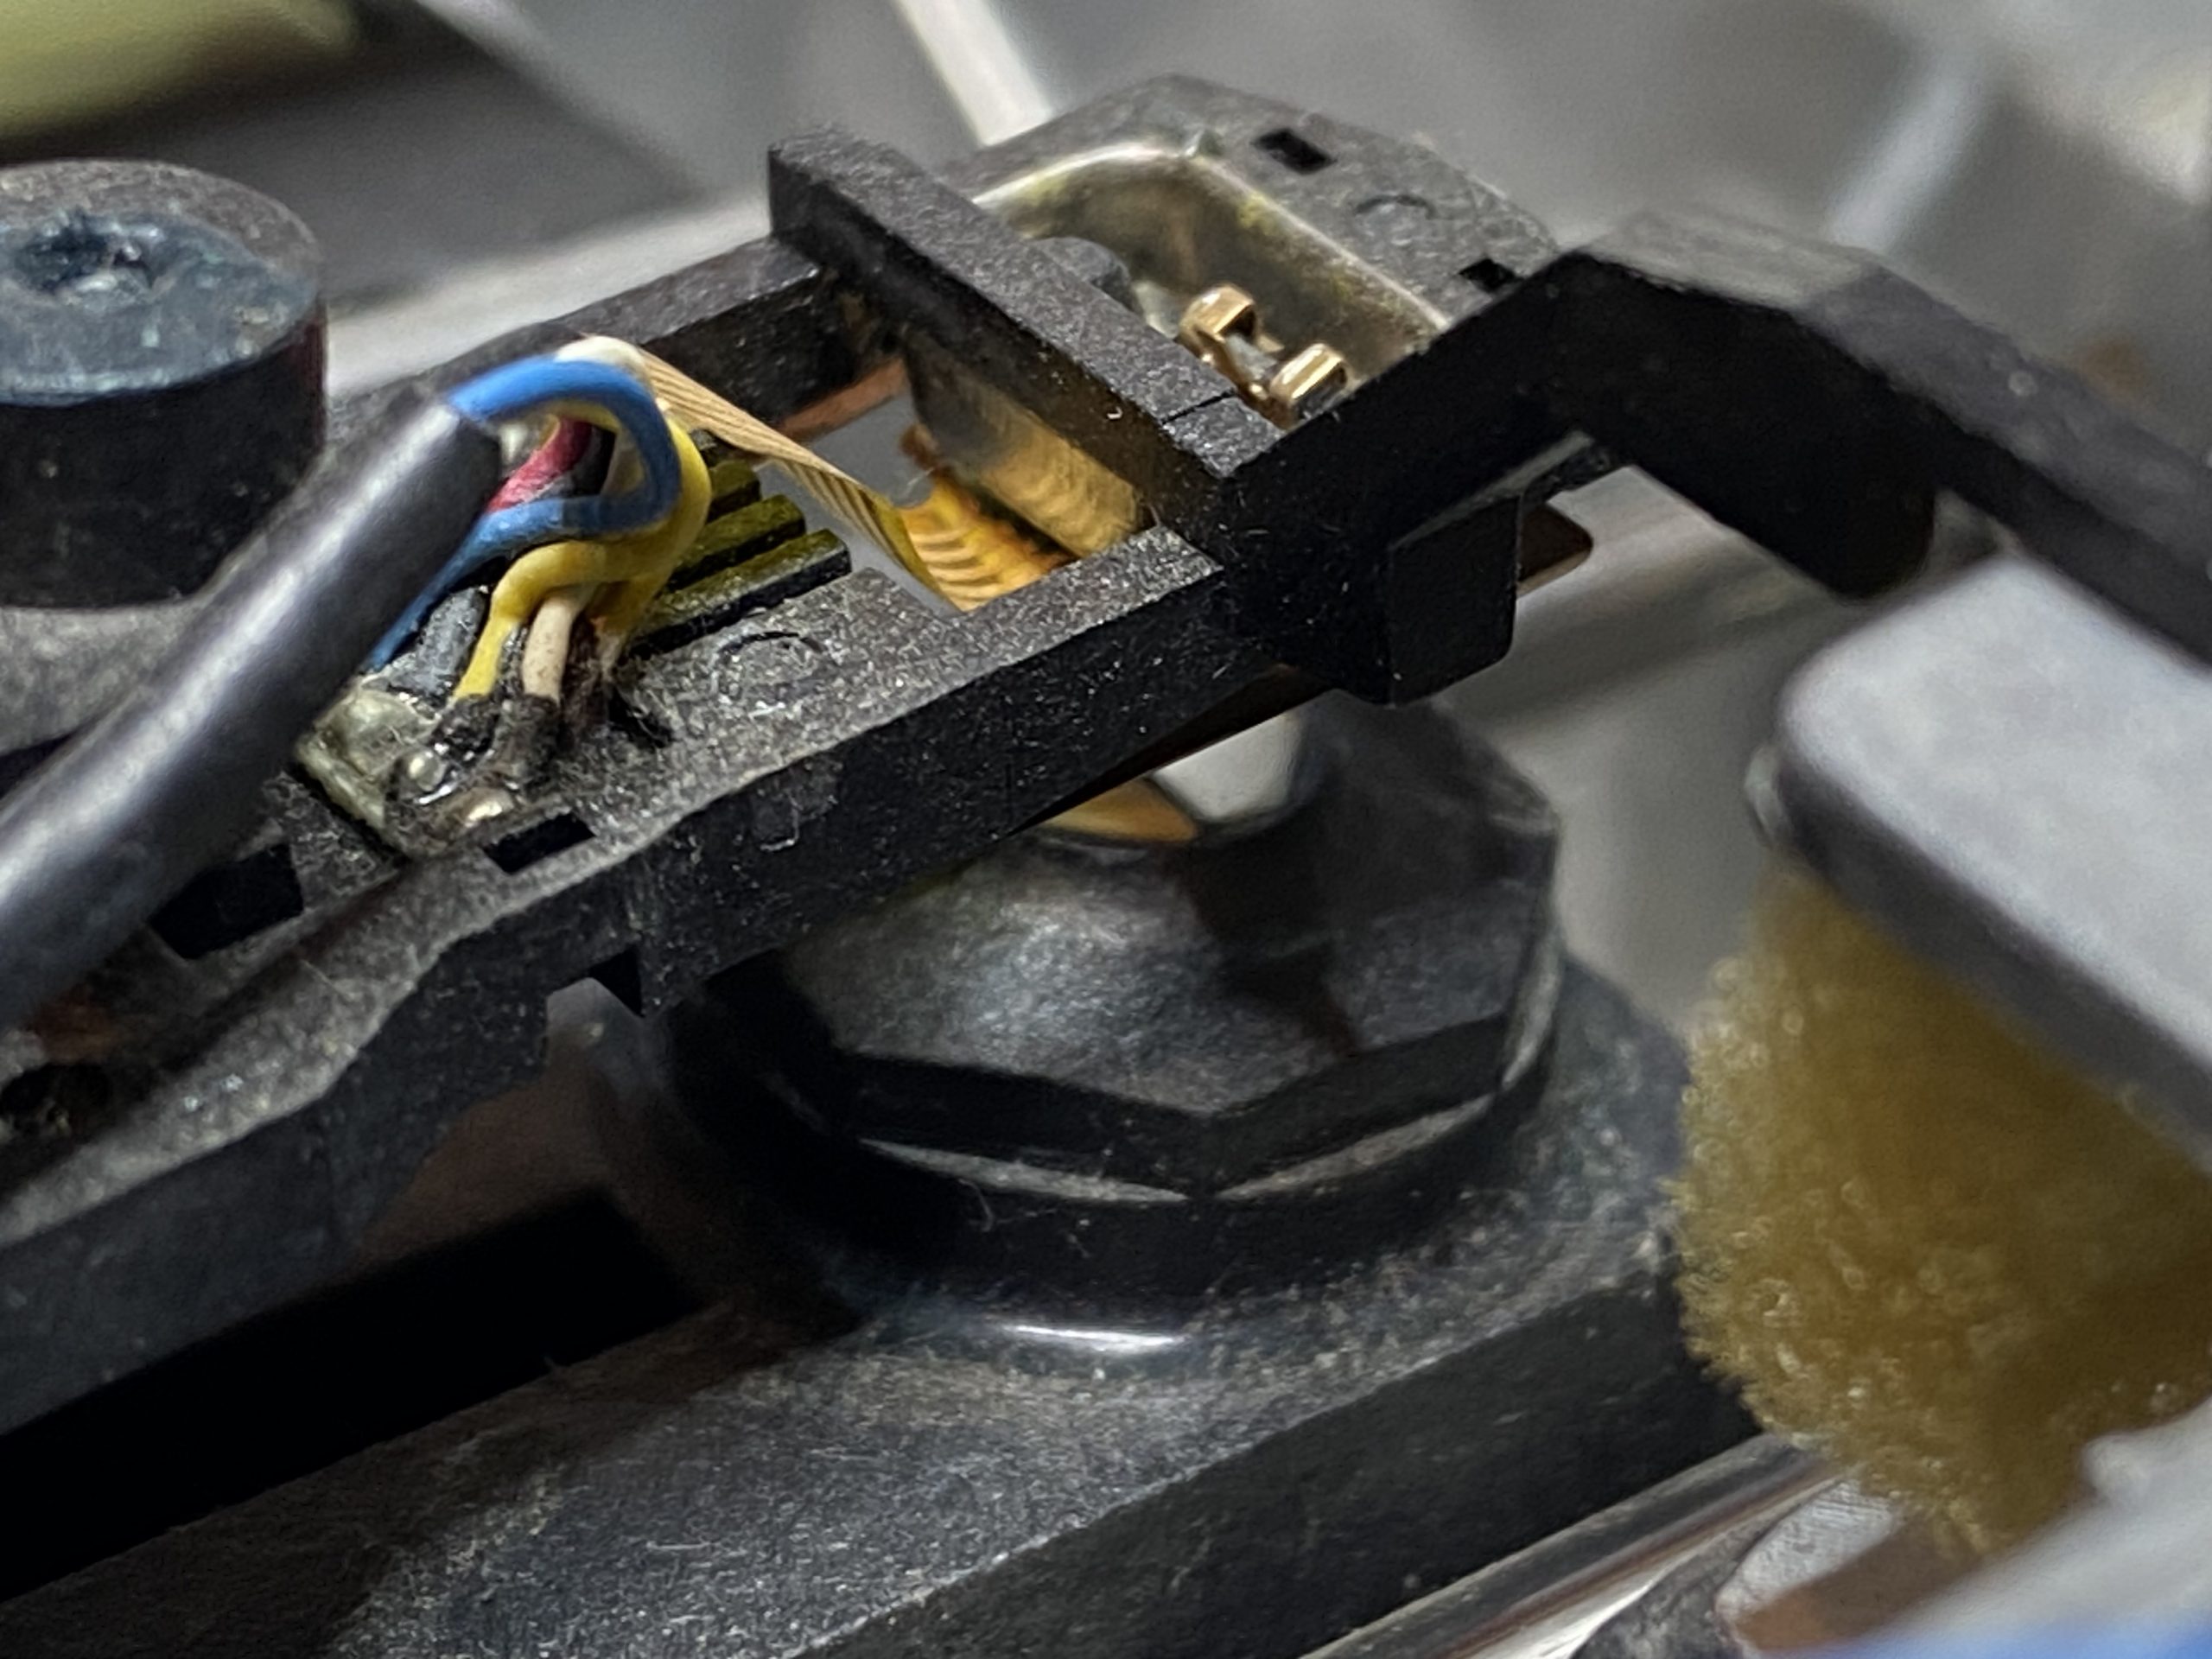
Now, after all cleaning and lubing, the drive wouldn’t still read disks that it hadn’t formatted itself, which pointed to a misaligned track 0 situation. In the TM-100 drives, the head is moved by a steel band that winds/unwinds from a wheel that is clamped to the head stepper motor. If the clamp comes loose, the wheel slips on the shaft and the mechanism gets out of alignment.
To re-align, I use a known good diskette and the IMD program. IMD is a disk imager which includes tools for head positioning and dumping raw track data. In particular, it can identify which track it reads and on which one the head is positioned. That way, it is possible to find track 0 by letting IMD run and adjust the drive mechanics until things are in alignment.

Caveat: The TM-100 drive identifies track 0 by conditions that must be met: 1) the track 0 sensor switch is activated and 2) the head stepper motor is in a certain phase. Adjusting 1) only can lead to the drive skipping from track 0 to track 2 when trying to seek track 1. Adjusting 2) is fiddly because it involves working on the above mentioned clamp while the drive is running. What worked in this instance was to let it seek to track 40, loosening the clamp only so much that the heads would still move and then letting it seek back to track 0, then tightening the clamp. This way, the stepper shaft can slip into the right position when the heads hit the track 0 stop.
Adding a MFM hard-disk drive
The HDD is a microscience 22MB MFM drive that I got with my 5155 portable which I changed to an XT-CF-lite solid state drive. It’s a period correct altough non-IBM addtion to the machine which probably was an aftermarket upgrade.

It’s installed in the first drive bay due to the limited cable length, and since it’s a half-height drive, I had to create a full-height bezel for it (find it on Thingiverse).
EGA Graphics and Adlib sound
The machine came with a non-functional MDA card, for which I don’t have a screen anyway. First, I tried it with a spare CGA card, which worked nicely, but as an original IBM card, it has an annoying screen flicker when scrolling and the typical CGA snow in games.
I therefore decided to swap it with the ATI EGA Wonder from the 5155 and to hook it up to an old 4:3 DELL LCD via the GBS-8220 scan converter. For this, the 25kHz Taxan mode is great – it supports all the different EGA modes and the GBS-8220 syncs to it better than to the original EGA modes.

I also added a ESS 1868F Audiodrive card which supports Soundblaster and Adlib sound eventough it is a jumperless 16-bit card. It initializes by calling ESSCFG.EXE from AUTOEXEC.BAT which takes several seconds.
Conclusion
I like the IBM 5160 for its look, its built quality and the easy serviceability. This restoration has been fun and interesting: It’s nice to dive into the beginnings of PC computing, and restoration work is easy because of good parts availability—the IBM PC was built from off-the-shelf components—and plenty of documentation is out there. It’s interesting to try out the various additions one can make via ISA expansion cards, which is a huge experimentation field in itself.
If you are after retro-gaming or trying out old software, probably a later 486 or pentium class machine might be more fun as they offer standard VGA output that can more easily be hooked up to modern screens and the higher processing power will cover a much broader range of software titles up to Windows 98 based stuff, because let’s face it: the XT even in a turbo configuration is limited to basic text based software and simple games up to the Space Quest II era.
IBM 5160 Technical Data
| This 5160 | Original IBM Spec | |
| CPU | NEC V20 | 8088 @ 4.77 MHz |
| FPU | Intel 8087 | – |
| Memory | 640kB | 128 – 640kB |
| Harddisk | 20MB Microscience XTCF-lite CF card drive | 10 / 20 MB Seagate |
| Removable Media | 360kB Floppy Disk Tandon TM-100 | 360kB Floppy Disk Tandon TM-100 |
| Video | ATI EGA Wonder | Monochrome Display Adapter |
| Other | Genius GM-6 serial Mouse Genius GS-4500 Scanner ESS 1868F Audiodrive | |
| Manufactured | 1983 – 1987 | |
| Release Price | USD $7,545 in March 1983 (config. w. 640kB and 10M HDD) USD $24,164 inflation adjusted (as per April 2024) |
Links
Related machines in my collection:
IBMs first attempt on a portable PC: RMC Portable PC (IBM 5155) Restoration, Upgrades and Testing
IBM Portable computers from the later PS/2 line: IBM PS/2 Portable Restoration and IBM PS/2 Laptop L40SX
Toshiba 80286 portable computer: Toshiba T3200 – the „spacesaver“
Toshiba Libretto – the tiniest machine running Win95: Toshiba Libretto 50ct
External Links:
https://www.minuszerodegrees.net – a great resource for everything around the IBM PC line of computers
https://ardent-tool.com – everything around the IBM PS/2 computer line
3D Printed Parts:
Full height 5.25″ hard drive bezel on Thingiverse
Page Visits: 119001

